As coaches, our primary responsibility is to guide members toward safe, effective movement patterns. Among all the teaching strategies available to us, focusing on start and end positions stands out as the most effective approach for developing member competence. This method provides clear, measurable targets that naturally guide quality movement execution.
The Coaching Philosophy: Why Position-Based Teaching Works
When we teach positions rather than complex movement patterns, we transform how our members learn. Members who understand where they need to be at the beginning and end of a movement develop an internal compass that guides them through even the most challenging exercises. This approach works because it leverages the body’s natural ability to find efficient paths between two well-defined points.
Teaching the Start Position: Setting Your Members Up for Success
Every successful movement begins with proper setup, and this is where your coaching makes the greatest impact. The start position isn’t just about getting ready—it’s about creating optimal conditions for safe, powerful execution. Teach your members these essential elements:
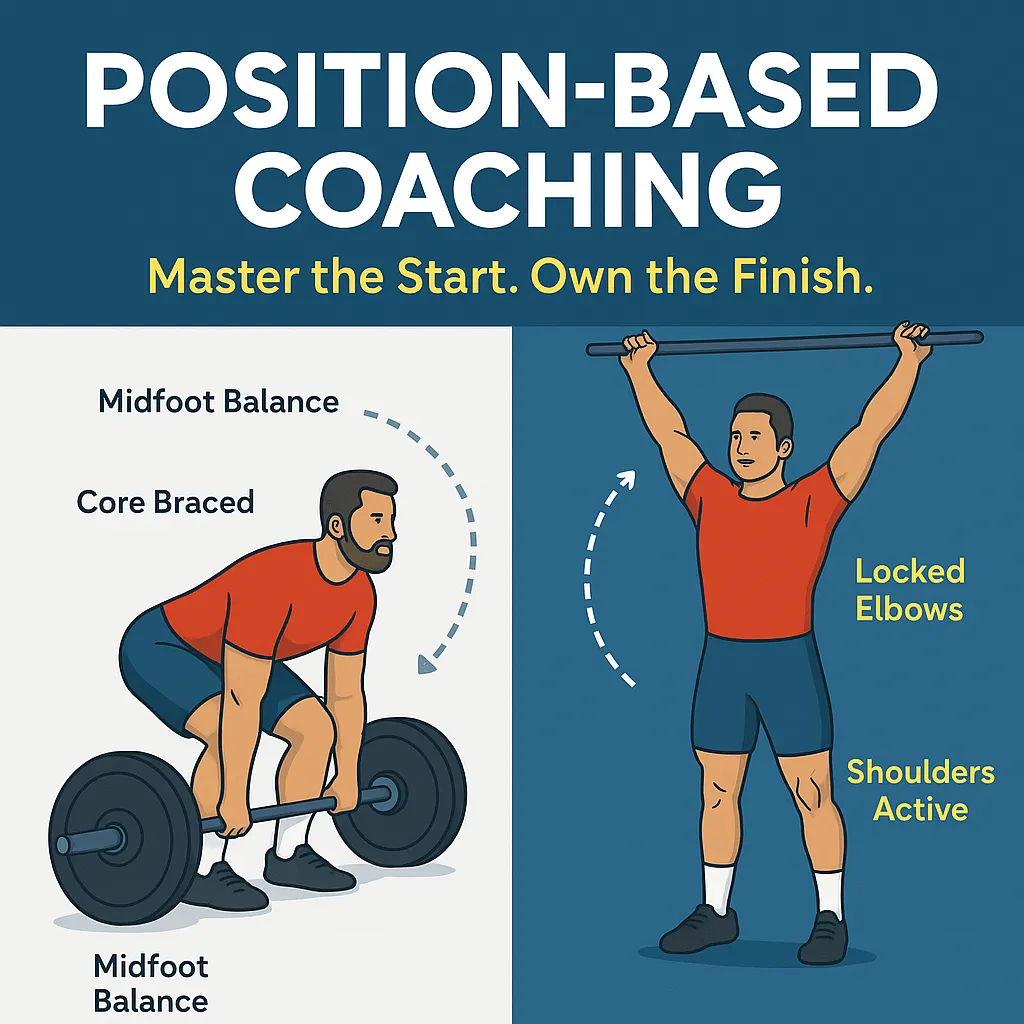
Weight Distribution: Help members establish balance through the mid-foot to create a stable platform for force generation. Use cues like “feel your whole foot” or “root into the ground” to help them understand this foundation.
Core Engagement: Teach members to pre-tension their core before movement begins. This provides the spinal stability necessary for both safety and performance. Coach them to “breathe behind the shield” rather than holding their breath.
Postural Alignment: Guide members to maintain eyes forward and chest up to establish proper spinal mechanics. Use visual cues and hands-on corrections to help them feel the difference between good and poor positioning.
Teaching the End Position: The Diagnostic Tool
The receiving or end position serves as more than just a finish line—it’s a diagnostic tool that reveals the quality of everything that came before. Whether your member is catching a clean, locking out a press, or hitting the bottom of a squat, this position tells the story of their movement execution.
When members clearly understand their target position, they develop the ability to self-correct mid-movement. Your job is to help them recognize what good positions feel like and look like.
The Critical Assessment Phase: What Every Coach Must Do First
Here’s where many coaching approaches fail: understanding proper positions means nothing if your member lacks the physical capacity to achieve them. This is why assessment must precede instruction in every coaching interaction.
How to Identify Capacity Limitations in Your Members
1. The Front Rack Position Assessment Before teaching cleans, assess whether your member can achieve the front rack position. Have them hold a PVC pipe or empty barbell in the front rack. If they lack adequate wrist flexibility, lat mobility, or thoracic extension, they’ll compensate by holding the bar in their hands with dropped elbows. Address these limitations before progressing to dynamic movements.
2. Ring Support Assessment for Muscle-Up Progressions Before attempting muscle-ups, ensure your member can demonstrate a stable support position on the rings. Without shoulder stability and core strength to maintain this position, attempting the dynamic transition becomes dangerous. Test their ability to hold a 30-second support before progressing.
3. Overhead Position Assessment for Snatches Test your member’s overhead position with a PVC pipe or empty barbell. They should achieve locked arms, active shoulders, and the bar over their base of support. If they cannot maintain this position, work on shoulder mobility and stability before introducing the snatch.
4. Overhead Squat Assessment This movement reveals limitations in ankle, hip, thoracic, and shoulder mobility. Watch for members shifting onto their toes (ankle mobility), rounding their backs (hip mobility), or dumping the bar forward (shoulder mobility). Each limitation requires specific corrective work.
5. Hollow Body Assessment for Gymnastics Movements Test your member’s ability to hold a hollow body position before teaching kipping pull-ups, toes-to-bar, or handstand push-ups. Members who cannot maintain this position lack the prerequisite core strength for these movements.
6. Hip Hinge Assessment for Deadlifts Many members understand they should keep their backs neutral during deadlifts, but tight hamstrings or poor hip mobility forces them to round their spines. Test their ability to hinge at the hips with a dowel touching their head, upper back, and tailbone.
7. Deep Squat Assessment Test your member’s ability to achieve a full-depth squat with upright torso. This requires adequate mobility at the ankles, hips, and thoracic spine. Use the overhead squat or bodyweight squat as assessment tools before trying dynamic exercises like box jumps or wall balls.
8. Jerk Lockout Assessment Test your member’s ability to lock their arms overhead while maintaining a stable midline. Have them press light weight overhead and hold for 10 seconds. Poor lockout ability indicates lack of elbow or shoulder mobility.
9. Pike Pushups Pike pushups require a high degree of internal shoulder rotation strength and triceps strength. A member who does not possess this base-line strength will inevitably flair their elbows causing rotator cuff injury. The exercise looks easy, but is difficult for beginner and intermediate athletes to do correctly with a risk of injury to those who do not possess the perquisites.
10. Toes-to-Bar Position Requirements Before teaching toes-to-bar, assess your member’s ability to achieve both the hanging position and the target position. Test whether they can hang from the bar with active shoulders (not relaxed and stretched out) and maintain a tight hollow body position. Then check if they can bring their toes to the bar while maintaining straight legs and avoiding excessive swinging. Members who lack the grip strength to hang will drop prematurely, those with weak core strength will bend their knees excessively or use wild kipping motions, and those with tight hamstrings will be unable to bring straight legs to the bar. Each limitation requires specific development—grip strength training, strict hanging leg raises for core development, and hamstring mobility work respectively.
Your Assessment-First Coaching Protocol
Before teaching any movement to a member, systematically assess their readiness:
Step 1: Position Assessment
- Can the member achieve the required start position without load?
- Can they maintain quality as you add resistance?
- Do they understand what the end position should look like and feel like?
Step 2: Limitation Identification
- What physical limitations prevent proper positioning?
- Are these mobility, stability, or strength issues?
- What corrective exercises are needed?
Step 3: Capacity Building
- Address limitations before advancing movements
- Use specific corrective exercises
- Retest regularly to track progress
How to Build Member Competence Through Systematic Progression
Once you’ve identified capacity limitations, address them systematically with your members:
Static Before Dynamic: Have members master positions without movement before adding complexity. Teach them to hold the bottom of a squat before squatting, or support on rings before dipping.
Unloaded Before Loaded: Develop mobility and motor patterns with bodyweight before adding external resistance. Perfect the air squat before progressing to the back squat.
Partial Before Full: Use range-of-motion progressions to build toward full movements. Box squats can develop strength while working on mobility for full-depth squats.
Strict Before Kipping: Build the strength foundation before adding dynamic components. Strict pull-ups must precede kipping pull-ups, just as strict presses inform push presses and jerks.
Managing Member Expectations: The Long Game Approach
This coaching approach requires patience—from both you and your members. It’s tempting to rush toward complex movements, but sustainable progress comes from respecting prerequisites. Help your members understand that spending time developing the mobility for proper positions will ultimately allow them to perform movements more safely and effectively.
Key coaching messages:
- “We’re building a foundation that will serve you for years”
- “Every position we perfect now prevents injuries later”
- “Quality positions lead to quality results”
- “We’re not just teaching movements—we’re teaching you to move well”
Creating a Position-First Coaching Environment
Visual Aids: Use photos, videos, or demonstrations to show members exactly what positions should look like.
Hands-On Corrections: Guide members into proper positions so they can feel the difference.
Regular Position Checks: Incorporate position holds into warm-ups and cool-downs.
Progressive Loading: Only add weight or complexity when positions are mastered.
Consistent Cueing: Use the same position-based language across all coaching staff.
Conclusion: Your Role as a Position-First Coach
Teaching start and end positions isn’t just about technique—it’s about matching your instruction to each member’s capacity. When you assess before you instruct, address limitations before adding complexity, and ensure prerequisites are met before progressing, you create an environment where members don’t just move well—they understand why they move the way they do.
This understanding, combined with the physical capacity to execute, creates members who can self-coach, self-correct, and ultimately achieve their goals while staying injury-free. That’s the true power of position-first coaching: it teaches members to be students of their own movement, setting them up for a lifetime of successful training under your guidance.
Remember: every compensation pattern your members learn is a future correction you’ll need to make. By ensuring they have the capacity to achieve proper positions before advancing movements, you create resilient members who can train hard for years without breakdown—and that’s the mark of exceptional coaching.